
I picked up this Queen Anne style coffee table at Goodwill for $15. It was really, and I mean really, scratched up. In one spot it looked like someone had scratched back and forth in the same place about 400 times. In another spot, it looked like someone had actually tried to obscure a deeper scratch by scratching back and forth across it – as if they were trying to scribble it out. And that’s possible, because the underside was drawn all over by a creative little kid. But the bright side was that none of the scratches were deep into the wood, so I could try to restore the finish rather than completely refinishing. But first I had to determine what the finish was.
I put several different solvents in different places – denatured alcohol, mineral spirits, lacquer thinner, and acetone. Based on what it did to the finish, I figured out it was shellac. I went out and picked up Old English scratch cover for dark woods, some touch-up pens to match various wood stains, and a can of shellac. Next I hand sanded it to smooth it out a bit. Then I went over it with the Old English scratch cover, finally remembering to take a picture just before I got to the end.
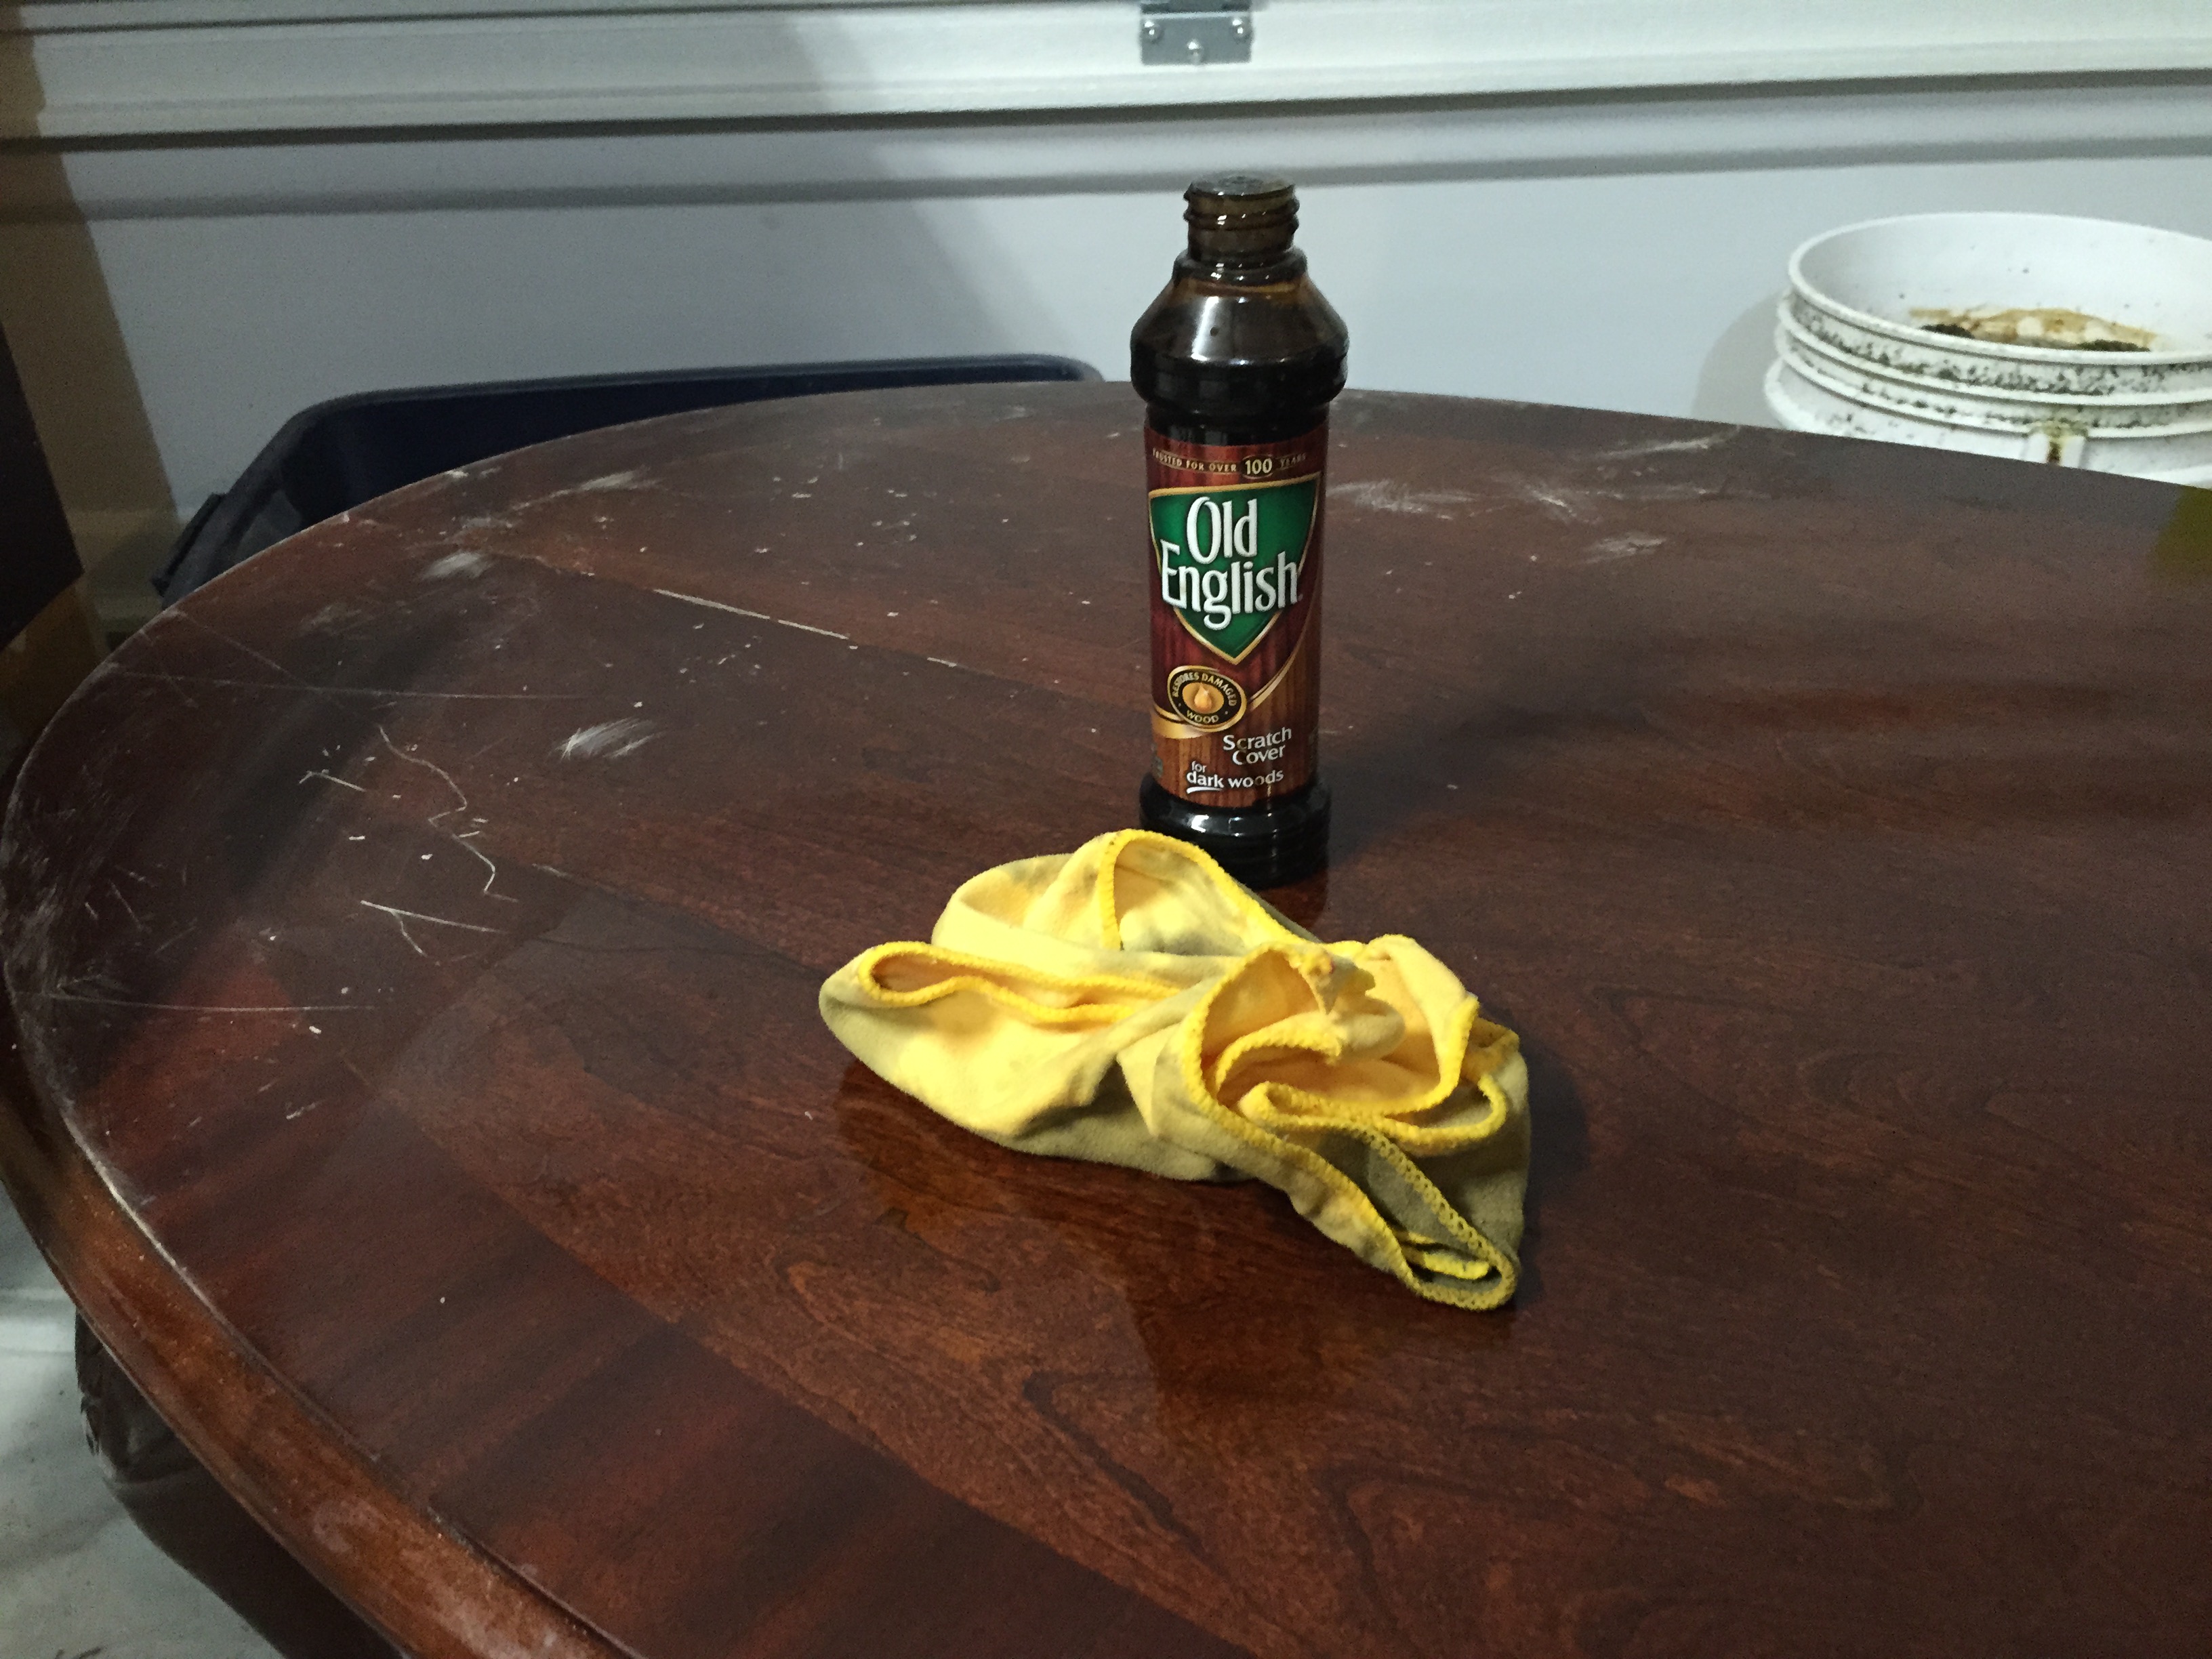
That made it look better, but there was still one spot where I had to use the touch up pen, and you could still see tons of scratches when light shined on the surface.
Next I started brushing on shellac. That stuff is pretty cool. It dries SO fast! That’s good and bad. At first I couldn’t get the hang of painting fast enough. It was literally getting tacky in seconds, so I couldn’t go over the same spot 10 seconds after I did it. That forced me to work fast. You’re supposed to apply multiple coats to get the right build up of finish, which I did, but could still really see the scratches. I knew I was going to have to sand, so I took a power sander and sanded down almost to the wood. In a couple of spots I actually got through to the wood, but I could tell right away and managed not to sand off the stain at all – thank goodness!
I applied several coats of shellac again. The challenge I had now was, while the shellac made a very shiny finish and I couldn’t see the scratches anymore, I could still see brush strokes. That drove me nuts.
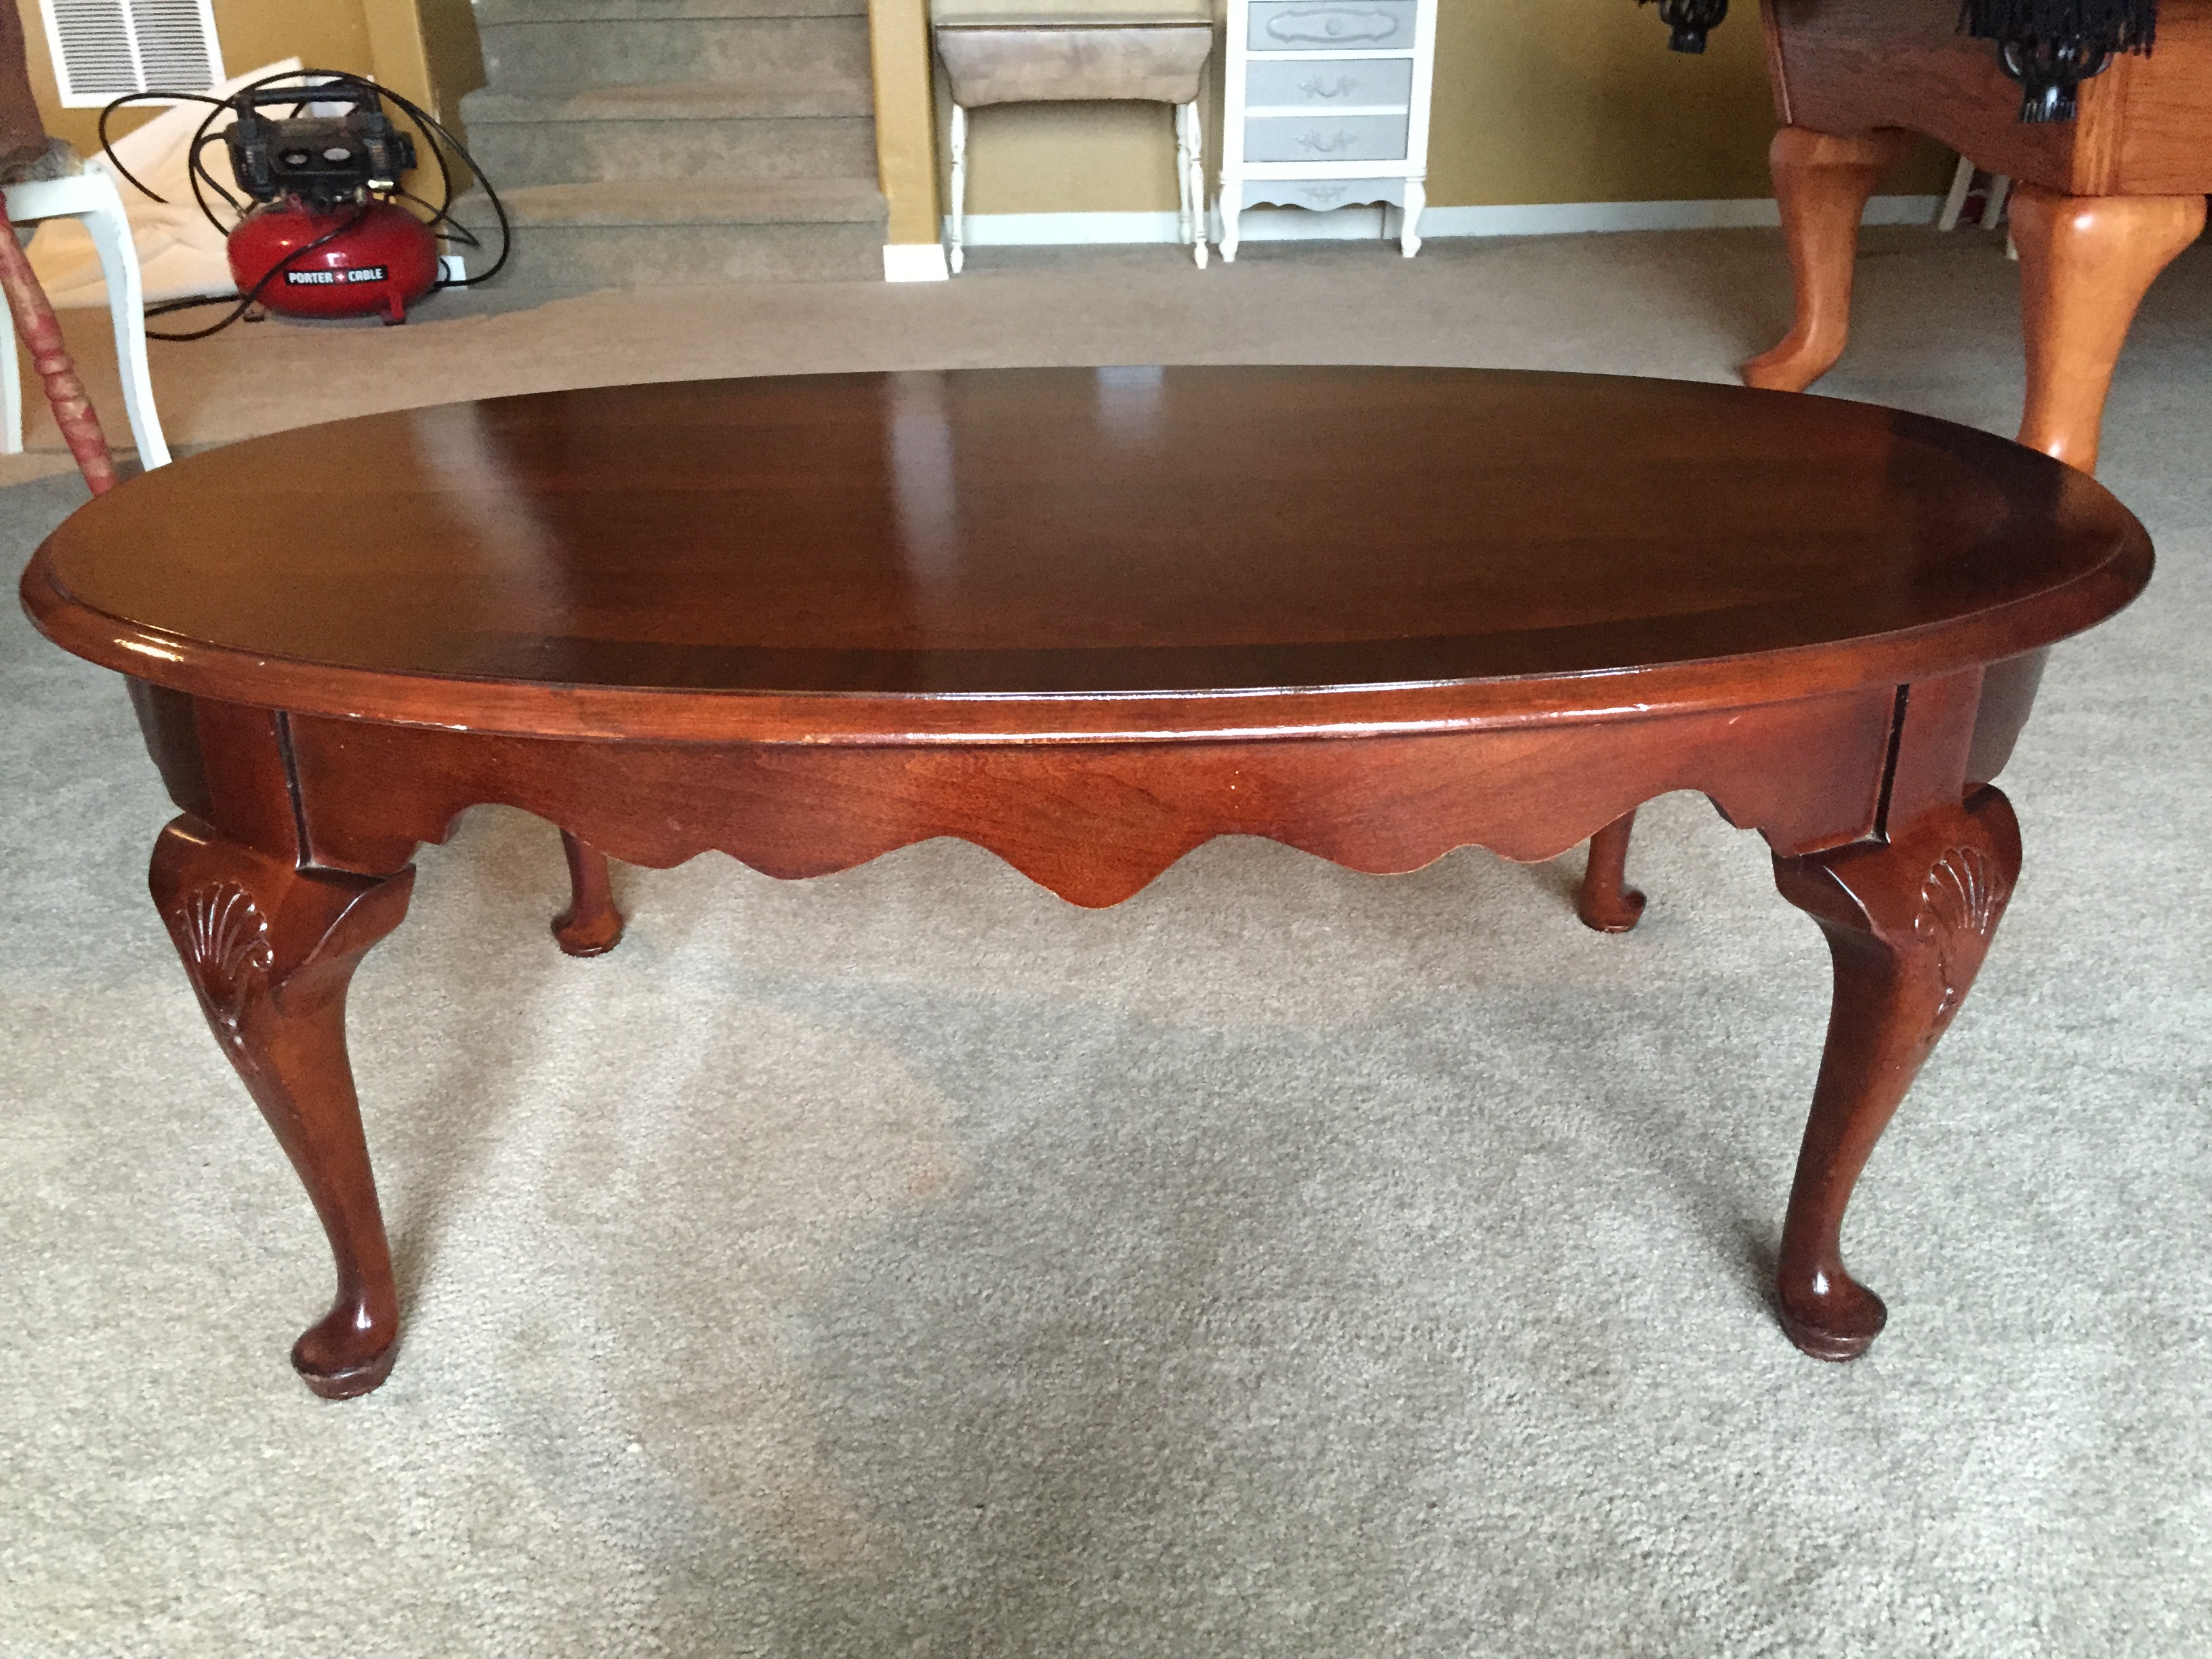
I went out and bought shellac, in a spray can this time. I applied a few more coats which made the brush strokes invisible. It was a somewhat more matte finish because of the spray pattern, but it looked smooth and still had a good shine to it. I told my inner perfectionist that it was time to call it good, right after applying a coat of almost black paint over the artwork on the underside. Here’s the final product…
2 Responses
Troy
The big square air filters for a house furnace fit pretty well on the front of a big box-fan. That plus some creative duct taping painter’s plastic (blow the filtered air into your plastic bubble to create positive pressure with reduced dust) and you’ll have a passable “clean room” for spraying on finishes!
Cami LeWarne
Winter’s almost here and we’re supposed to get an ice storm tonight, so I may need to try out your suggestion soon. I’m not going to be able to just open up the garage door while I’m spraying much longer! If/when I try it, I’ll write a post on it with pictures. 🙂